Sunday, May 19, 2013

Cooking up Controversy: Falafel, Baba Ganoush, and Hummus

Check out this recipe on my new and improved website: thewalkingcookbook.com

When an obscure musician becomes famous, everyone wants to claim being a fan "since they were playing out of their garage." When a trend appears in Vogue, everyone wants to say that they were rocking the style when they were the only one. During the Olympics, people suddenly are filled with patriotism as they see their countries winning medals. People love to claim success, and it is no different with food. Let's take Falafel, for example. Israelis claim it, Palestinians claim it, Egyptians claim it... and I will never forget my disenchantment with Greece after my futile search for falafel in Athens. Yep, the Greeks claimed it too (but were clearly lying to me). Although this "food fight" can be frustrating, it is nice to know that people still get passionate and proud about cuisine.

Some say that the truth must be revealed so that credit is given where credit is due, but I like to think that we can all take joy in "owning" part of these traditions. Although I am Swedish by heritage, American by ethnicity and culture, and Californian by identity, if I develop a delicious recipe inspired by another culture's cuisine, I hope that someday my great grandchildren will say, "That's my awesome, youthful, vibrant, hip great-grandma's recipe, and it is in my blood." I hope that they defend it as part of their identity and respect that others feel the same way.

This week I made falafel, hummus, and baba ganoush, the first two recipes in an Israeli style based solely on the fact that Taïm in NYC makes a killer falafel and the owner, Einat Admony, is Israeli. I followed her recipes for falafel and hummus, memorizing them along with baba ganoush to serve to a large party this week.
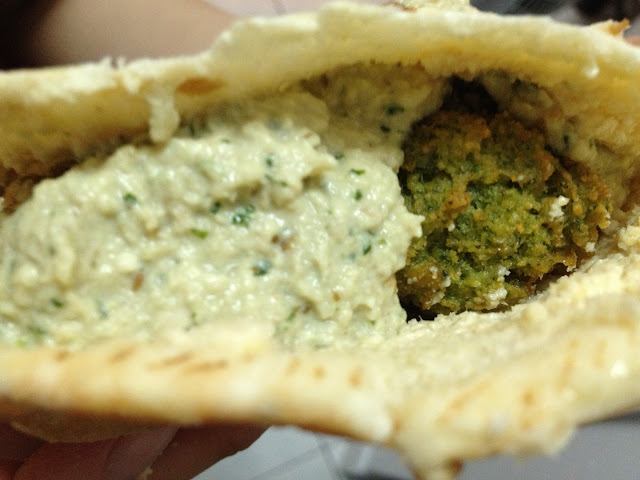


About Falafel, Hummus, and Baba Ganoush
Falafel (as well as the sauces served with it) has been a source of pride for some and a source of conflict for many. Countries throughout the Middle East claim falafel as their own, but no two states have a higher profile debate going on than Israel and Palestine.* I explored this debate and found many, many opinions, but some of the more academic opinions caught my eye.

The authors of Beyond Hummus and Falafel: Social and Political Aspects of Palestinian Food in Israel argue that falafel is a Palestinian food that became part of Israeli cuisine as naturally as any immigrant cuisine merges with a new country. They write that with the establishment of Israel, Palestinian citizens of Israel kept their own immigrant dishes "in the private sphere, not so much due to the reluctance of the Palestinian population to expose its food as to the suspicions of Jewish people toward Arab food. Some, but only relatively few, of its components were appropriated by Jewish knowledge agents and became identified as 'Israeli' dishes."

Joan Nathan, the author of The Foods of Israel Today, disagrees that falafel originated as a Palestinian food and became Israeli through proximity. The New York Times quotes her as saying, "Falafel is a Biblical food. The ingredients are as old as you're going to get. These are the foods of the land, and the land goes back to the Bible. There have been Jews and Arabs in the Middle East forever, and the idea that Jews stole it doesn't hold any water."

Long story short, when discussing a region where political boundaries have been (and continue to be) so fervently contested, we must remember that the world has gotten smaller since the development of civilization. Overlap and adoption of cuisines is natural, normal, and (I would argue) completely positive. After all, I cannot imagine a world in which I am constrained to consuming nothing but the agricultural resources of the island of Manhattan.

*I have been choosing my wording as carefully as possible so as to not offend readers about something I am still learning about. I have used the word state to refer to both Israel and Palestine. This choice is based on the United Nation's recognition of Palestine as a "non-member observer state" and Israel as a member state.


Choosing the Recipes
I am slightly addicted to the cooking competition show Chopped, which led me to become familiar with chef Einat Admony. She is an Israeli chef and the owner of Taïm Falafel and Smoothie Bar in NYC. Although I had never been to Taïm before planning this meal, I knew from her attitude and positive reviews on Chopped (she won!) that I could expect a delicious meal. I decided to forego my usual weekend Bagel Run™ (my 3-mile run to Absolute Bagels to buy a bagel) for a much longer Falafel Run (trademark pending). I jogged down the West Side Highway and back into the heart of Nolita, where I chugged a bottle of water and ordered a fantastic Green Falafel Sandwich. I knew then that I had chosen my recipes wisely.

As for the Baba Ganoush recipe, I must admit, I went with aesthetics. I love a website that is easy to navigate, visually appealing, and clear. Cook, baker, and cookbook author David Lebovitz had the prettiest looking Baba Ganoush recipe I could find, making his the winner despite the fact that his forte is dessert. I modified his recipe quite a bit to fit the use of my new cooking goody, my stovetop smoker. However, I trust that it would be very tasty without the smoking process as well.


Memorizing the Recipes
Mise en place, my favorite fancy French term that makes life trés easy, was the key to this dinner. I chopped, measured, and poured all the ingredients into little containers and set them out for easy mixing when the time came.

So many of the ingredients overlap that I feel like a Venn Diagram is in order. Ratios are important (about 1/2 cup tahini for every 4 cups of something else, for instance). The falafel had a surprising amount of salt, and I upped the lemon juice for all of the recipes. Here's the gist, though:
The Verdict
I adore my smoker! It smelled like summer in my apartment, with a woodsy, charred smell perfuming the air without choking us all with smoke. I was blown away by the success... the Baba Ganoush was one of the best I have ever had. Look out for more smoked foods in the future. The hummus remained a bit gritty despite the addition of olive oil, and I wonder if canned garbanzo beans would make a difference. I didn't mind the grit at all but some people like their hummus Sabra-smooth, and this was not. The falafel recipe was true to the restaurant, and it was delicious. I always wonder if chefs publish a slightly less delicious version of their restaurant recipes so that they can never quite be replicated at home. However, Chef Admony gave a marvelous falafel recipe for any home cook to make.

Making the falafel into sandwiches was a great way to save some plates (we just ate our sandwiches using a paper towel), and extra side dishes were easy. I set out some baby carrots with extra hummus, dried figs and apricots with honey-drizzled ricotta, and the Israeli salad (parsley, cucumber, and tomato).

The Recipes


Taïm's Green Falafel
Adapted from The Jew and the Carrot, recipe by Einat Admony
Yield: 30 falafel balls (enough for 6 sandwiches)
Ingredients:

  • 1 bottle canola oil, for frying
  • 2 cups dried chickpeas, soaked overnight and drained
  • 1/2 large yellow onion, roughly chopped
  • 2 cloves garlic, pressed and roughly chopped
  • 1 cup flat parsley leaves
  • 1 cup cilantro leaves
  • 2-3 fresh mint leaves
  • 1 tsp cumin
  • 1 tsp ground coriander
  • 1 tbsp salt (yes, a tablespoon)
  • black pepper, to taste

Preparation:

  • Pour 3-4 inches of oil into a deep pot and heat over a medium flame to about 275°F. If you don't have a thermometer, heat until you see swirls develop in the oil, then test the oil by placing a soaked chickpea in the oil. If it sizzles and bubbles start gathering around it, the oil is ready.
  • Meanwhile, place the chickpeas, onion, and garlic in a food processor and pulse until a course, moist meal forms.
  • Add the remaining ingredients (minus the oil) and continue pulsing until all chickpeas are broken down and the ingredients have combined into a soft, malleable dough (it should have the texture of moist soil).
  • When the oil is ready: Using a small cookie dough or ice cream scoop, scoop out a ball of dough and carefully release it into the oil near the side of the pot. Holding the scoop close to the oil helps avoid splashing, but please be careful.
  • Repeat with more balls of falafel dough, working your way around the pot in a circle. The number of falafel balls you fry at once will depend on the size of your pot.
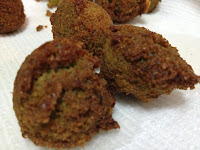
  • Let fry until the balls float to the surface of the oil and have a light brown, firm exterior (about 4 minutes). Remove with a slotted spoon and place on a paper towel-lined plate.
  • Repeat until all dough is used. Serve immediately.
  • Cooking oil can be strained and saved in a glass container for future frying. Refrigerate after saving. See further details here.


Hummus
Adapted from Balaboosta Way
Yield: 8 servings
Ingredients:

  • 4 cups dried chickpeas, soaked overnight and drained
  • 1/2 cup tahini
  • 1/2 cup water
  • 1/4 cup lemon juice
  • 3 cloves roasted garlic
  • 1 tsp salt
  • 1/2 tsp cumin
  • black pepper, to taste
  • 1/4 cup extra virgin olive oil (use the good stuff)

Preparation:

  • Place all ingredients except the oil into a food processor and blend until smooth.
  • While the mixture is processing, drizzle the oil in.
  • Garnish with another drizzle of olive oil and some parsley leaves


Smokey, Lemony Baba Ganoush
Adapted from David Lebovitz
Yield: 8 servings

Ingredients:

  • 3 medium-sized eggplants, halved lengthwise
  • 1/2 cup tahini
  • 1 tsp course salt
  • 1/4 cup lemon juice
  • 3 cloves garlic, pressed and smashed
  • 1/8 tsp cayenne pepper
  • 1/2 bunch flat-leaf parsley
  • Optional: 1 tsp smoked paprika or smoked salt (recommended if you are not using a smoker for the eggplant)

Preparation:

  • If using a smoker, follow the manufacturer's instructions. They are quite simple: Add 1 tbsp wood chips to the bottom of the smoker. Place the drip pan and the cooking rack on top. Put the eggplant skin-side down on the cooking rack and close the lid 3/4 of the way. Turn on the stove to medium heat, and once the first wisp of smoke shows, close the lid all the way. Cook for 18 minutes.
  • Meanwhile (or if not using a smoker), preheat the oven to 375°F.
  • Place the smoked or raw eggplant on a baking sheet and roast for 25 minutes until completely soft.
  • Remove from the oven and let cool.
  • Scrape out the pulp and place in a food processor with the other ingredients. Puree until smooth.
  • Taste and adjust the salt and lemon juice if necessary.
  • Drizzle with olive oil to serve.
Assembling a Falafel Sandwich:
1. Spread the entire inside of a pita pocket with hummus (reach down to the very bottom of the pocket)
2. Add 2 falafel balls and press them down to the bottom of the pocket.
3. Add some Israeli salad (tomatoes, cucumbers, and parsley chopped together with a splash of vinegar or lemon juice)
4. Place 3 more falafel balls side by side.
5. Top with baba ganoush and/or tahini.

Sunday, May 12, 2013

Breakfast for Dinner: Apple-Plum French Toast, Goat Cheese Quiche with Fresh Herbs, and Potato Pancakes

Check out this recipe on my new and improved website: thewalkingcookbook.com

I never thought I was a fan of breakfast food for dinner. At brunch events, I used to always go with less br- and more -unch. I've always known that if I have already eaten a breakfasty food, no matter how small a portion, I won't want more until the next morning. That is, however, until this week. I realized that many of my Walking Cookbook goals were breakfast foods: muffins, pancakes, French toast, etc, etc. I had to check them off somehow, so the breakfast-for-dinner idea was born. And boy, have I been wrong about it this whole time! Read on to see how breakfast can easily be made into a lovely dinner, savory enough to feel like an evening meal and sweet enough to not need dessert. I made French toast with apple-plum compote, a goat cheese quiche with fresh herbs, and some potato pancakes with chive sour cream. And of course, a B4D event would not be complete without mimosas... they provide much needed Vitamin C.

About Breakfast Foods
I recently read the book The Fault in our Stars by John Green, in which intellectually and comprehensibly cynical 16-year-old Hazel thinks deeply about small aspects of life as she lives expecting to die from cancer. One of these things is the classification of "breakfast food." She gets admirably annoyed by the fact that certain foods are considered breakfast foods and that the world just signs onto the idea without question. This (and the entire book) made me think a lot. Why are breakfast foods called breakfast foods? I did a little investigation, and although I still don't have a great answer I have some ideas.

In America's early years, corn-based breakfast porridge or cakes were common because of the pioneers' access to Native American corn crops. Cook's Illustrated editor Christopher Kimball mentioned in a CBS Early Show segment that baked corn "dodgers" would last almost indefinitely, making them perfect for travel and storage in pre-refrigeration days. As is true now, the wealthier classes had a larger and more varied breakfast, including meats, fish, eggs, and fruit. Eggs are commonly considered part of a morning meal because when people had their own chickens there was easy access to eggs, and the eggs laid overnight were the freshest in the early part of the day.

Brunch was fun to read about as well. It was first referenced in print (to food historians' knowledge) in a Hunter's Weekly article, but since nobody can seem to find that article, the Food Timeline cites an amusing quote from Punch Magazine (UK-- errors copied from source). Apparently brunch is a very specific term:

"Brunch v. Blunch! According to the Lady, to be fashionable nowadays we must 'brunch.' Truly an excellelnt portmanteuar word, introduced; by the way, last year, by Mr. Guy Beringer, in the now defunct Hunters Weekly, and indicatying a combined breakfast and lunch. At Oxford, however, two years ago, an important distinction was drawn. The combination-meal whn nearer the usual breakfast hour, is 'brunch' and, when nearer to luncheon, is 'blunch.' Please don't forget this." 
---"Fashionable and Seasonable," Punch, August 1, 1896 (p. 58)

As we still see today, breakfast traditions depend on culture and region but equally on privilege and wealth. After all this research, I considered myself very fortunate to have had breakfast twice in one day.


Choosing the Recipes
Going into this week's meal I knew I wanted something sweet and something savory. I also knew that I wanted to use apples (since my roommate, who is allergic to apples, was out of town). French toast and quiche were both on my Master Plan list, so I figured I'd give them a shot.

The French toast recipe was easy once I searched for an apple French toast-- I was tempted by a few fancy overnight French toasts or stuffed French toasts, but my goal has never been to memorize "special" recipes. I want the best of the basics. So I chose a nice Martha Stewart one with a basic French toast egg soak and a yummy apple topping. For the quiche I was torn between the beautifully photographed and well written recipe from The Kitchn and the less stimulating but nicely flavored herbal recipe from the NY Times. So I combined them! Potato pancakes were my own creation after poking around at about 10 different potato pancake recipes online.


Memorizing the Recipes
It turns out quiche is one of the easiest recipes I have ever made. I bought the crust, of course, but I used to think that even the inside would be difficult. It turns out you just need to know the right egg-to-half&half ratio and everything else is optional. Here is the golden ratio for two quiches: 6 eggs to 2 1/2 cups half & half.

The golden ratio for a loaf of french bread sliced into French toast is 1 cup milk, 3 eggs, 1 splash of vanilla extract (1/2 tsp), and a sprinkle of cinnamon. Then it's all about soaking and cooking in butter.

So there you have it-- two ridiculously easy recipes that satisfy the hungriest of diners.


The Verdict
I always love when I cook a meal and I get to sit down while it is cooking. It was pretty awesome. I started the apple-plum compote early and let it sit, mostly cooked, until we were ready to eat. The bread sat out as I prepped everything else, and I mixed all of the quiche filling and refrigerated it until about an hour before our guests arrived. The potatoes went into the food processor and sat for quite a while in their cheesecloth, and I sat down and watched an episode of New Girl. It was awesome. When it was time to cook everything, time went by super quickly, then we got to eat!

The food was excellent. While I would like to find something to bind the potato pancakes together a little better, using a biscuit cutter to keep them in a dense circle helped a lot. They were not too salty and went well with the chive sour cream. The French toast was the first dish to go-- it was crispy on the outside, moist on the inside, and the apple-plum compote was just delicious. In my opinion the star of the show was the quiche. I just love how it looks so complex and yet is a simple mix, pour, and bake process. I imagine that a quiche is a great opportunity to use leftovers in a fancy way. The herbs and goat cheese gave zest and tang, and the Whole Foods crust, while a little bit sweet, was buttery and crumbly around the filling. I took it for lunch the next day and it was the one time that reheated eggs actually sounded appealing to me. I was right.


The Recipes


While you are preparing the apples and plums, be sure your bread is drying out a bit on the counter. It helps the bread soak up the egg mixture.

Fry in butter for a golden exterior and wonderful taste. Oil just doesn't cut it.

 
Top these golden, sweet, eggy pieces of toast with the apple-plum compote for a sweet touch

French Toast with Apple-Plum Compote
Adapted from Martha Stewart
Yield: 10 pieces with topping

Ingredients:
  • 1 loaf of French country bread, day old and sliced 1/2 inch thick (about 10 pieces)
  • 3 eggs
  • 1 cup milk
  • 1/2 tsp vanilla extract
  • Ground cinnamon
  • 3 granny smith apples, peeled and sliced
  • 3 plums, sliced
  • 2 tbsp unsalted butter
  • 2 tbsp water
  • 2 tbsp brown sugar
  • Maple syrup for serving
Preparation:
  • Whisk the eggs, milk, vanilla extract, and cinnamon together and pour into a baking pan.
  • Add the bread in a single layer and let sit for 5 minutes. Turn once and let sit until it soaks up the egg mixture, another 5 minutes.
  • Place a large skillet over medium heat. Melt 1 tbsp butter and toss in the apples and plums. Stir until the fruit begins to caramelize, then add the water, a dash of cinnamon, and the brown sugar. Lower the heat and cook for about 8 minutes.
  • In a large, heated nonstick skillet, melt the other tbsp of butter over medium-high heat. Place the soaked bread until the crust is crispy, about 4 minutes on each side. You can place multiple pieces of bread in the same skillet as long as they have some space between them.
  • Serve the French toast with the apple/plum mixture on top and maple syrup on the side.
If you set up your ingredients ahead of time, the process is as simple as mixing and pouring.

Sprinkle the goat cheese into the pie crust before adding the filling.

The finished product in the oven. Let rest for 15 minutes.

Goat Cheese Quiche with Fresh Herbs

Adapted from NY Times and The Kitchn
Yield: Two 9"quiches (12 pieces)

Ingredients:
  • 2 9" frozen pie shells
  • 6 large eggs
  • 2 1/2 cups half-and-half
  • large pinch of salt
  • 2 tbsp chopped fresh thyme
  • 2 tbsp chopped fresh chives
  • 2 tbsp chopped fresh flat-leaf parsley
  • 2 tbsp basil chiffonade
  • 2 tbsp lemon zest
  • 2 tbsp grated parmesan cheese
  • ground black pepper, to taste
  • 6 oz. goat cheese, cut into 6 thin rounds and the rest crumbled
Preparation:
  • Heat the oven to 375°F. 
  • Whisk eggs, half-and-half, and salt in a large bowl until frothy.
  • Mix in parmesan cheese, herbs, lemon zest, and black pepper.
  • Scatter the crumbled goat cheese along the bottom of the pie crusts. Pour the custard (egg mixture) on top (divide evenly between the two shells) and gently place the goat cheese slices in a circle near the edge of each pie.
  • Bake for 45-50 minutes and let rest 15 minutes before serving.


Peel, process, and drain the potatoes.


Allow all the starchy liquid to drain out by weighing the potatoes down with something heavy (I used my CuisinArt)


Form pancakes with a biscuit cutter

Fry until golden and crispy

Potato Pancakes with Chive Sour Cream

From The Walking Cookbook
Yield: 16 pancakes

Ingredients:
  • 5 Russet potatoes
  • 1/4 cup flour
  • 2 eggs
  • salt and pepper to taste
  • 3/4 cup canola or vegetable oil
  • 1 cup sour cream
  • 2 tbsp chives, finely chopped
  • lemon wedges (optional, for serving)
Preparation:
  • Peel the potatoes. Shred in a food processor using the shredder blade (the most amazing invention).
  • Place a colander over a large bowl or in the sink. Place the potato in a piece of cheesecloth, wrap tightly, and squeeze out as much liquid as possible. Place the bag of shredded potato in the colander and weigh it down with a heavy object (I used the base of the food processor). Let sit for 15-30 minutes.
  • Remove the potato from the cheesecloth and place in a large mixing bowl. Add the eggs and mix. Add the flour, salt, and pepper, and mix until the potato is covered in egg and flour.
  • On a cutting board or other large, clean, flat surface, place a biscuit cutter or 3" round cookie cutter flat. Fill with some of the potato mixture and pack down to just under 1/2 inch thick. Remove the cutter and repeat the process with the remaining potato mixture.
  • Heat the vegetable oil in a 10-12" skillet until shimmering. Using a spatula, place four of the pancakes in the oil. Try to avoid them touching. Let cook for about 4 minutes. Try not to mess with them as they cook.
  • After 4 minutes check the bottom. If it comes up easily from the pan and is brown and crispy, carefully flip the pancake (I recommend using an additional spatula or fork for stability). If it is not done, give it about two more minutes.
  • Cover and cook for 4 minutes on the other side.
  • Remove from the oil and place on a paper towel-lined plate. Continue the process until all potato pancakes are finished.
  • To make the chive sour cream, simply add the chives to the sour cream and stir.
  • Serve the pancakes hot with a lemon wedge (optional) and a dollop of chive sour cream.

Sunday, May 5, 2013

Cool Mango Chutney: an enigmatic condiment

Check out this recipe on my new and improved website: thewalkingcookbook.com

In New York City, getting food delivered is just what people do. As someone who cooks a lot and dines out a lot, I am probably among the crowd that doesn't get a ton of delivery, but from time to time even I succumb to the ease of dialing a few numbers (or using the GrubHub app) and having food appear at my door in 40-60 minutes. Indian food is one of my favorites to get delivered because I can always guarantee there will be leftovers. This week I recreated my favorite delivery meal: Chana Masala, Indian spiced rice, Naan, and Mango Chutney (the memorized recipe of the week).


About Chutney
Chutney is an elusive food, but it's delicious. I love the way it brightens and cools the otherwise warm, spicy flavors of Indian food. It is considered a condiment, meaning it can be put on most foods. It is made with fruits or vegetables and Indian herbs and spices. Aside from that, I was not able to pinpoint any traditional guidelines for chutney.

After examining a number of websites with chutney recipes I was able to deduce the following components of the condiment and the different ways to attain each flavor profile:

  • sweet: fruit, sugar
  • sour: lime/lemon, vinegar (though some people get angry about vinegar being included)
  • salty: salt (of course)
  • savory: vegetables, herbs
  • spicy/astringent: cumin, hot peppers, onions, ginger, other Indian spices
Basically, a "good" chutney should have a bit of all of these flavors. What is not clear when it comes to making chutney is the following:
  • cooked vs. uncooked
  • smooth vs chunky
  • what fruits and vegetables are used
  • what herbs and spices are used
Choosing the Recipe
I knew I wanted to make a fruit-based chutney since I wasn't serving dessert this week. In addition to making the delicious Chana Masala, Indian Spiced Rice, and awesome Naan, I had to find and memorize the perfect chutney recipe. I soon learned that the task was impossible. On one website alone I found 150 recipes, and the Mango Chutney recipe I clicked on had terribly (or maybe wonderfully) vague instructions, so I picked it, changed it a bit, and ran with it until it tasted delicious.

Memorizing the Recipe
There was not a lot to memorize in this recipe since it didn't give much instruction, so I partially invented it. I think the best memorization tricks this week were knowing what Indian spices provided what flavors and learning how to incorporate sweet, sour, salty, savory, and spicy/astringent in the chutney.

The Verdict
Because the meal was so heavy, having a cool, bright mango chutney added a lot to the overall spread. I should have made more-- it was devoured! The sweetness of the mango and savory taste of the pepper paired nicely with the coriander, cumin, salt, and cayenne. The lime and vinegar really did the trick to balance out the sugar that was called for. I also was pleased that I made it partly pureed, since it spread well but still had its own crunchy texture.

The entire meal was delicious, and I highly recommend the recipes that I used for Indian rice and for Chana Masala. The Naan, as usual, was an enormous hit.


The Whole Meal

The Recipe
Cool Mango Chutney
Inspired by VahChef
Yield: about 2 cups

Ingredients:
  • 2 ripe mangos
  • 1 fresh poblano pepper
  • 3 tsp sugar
  • 2 tsp vinegar
  • juice from 1/4 lime
  • 1/2 tsp cumin
  • 1/2 tsp coriander powder
  • 1/4 tsp turmeric powder
  • pinch salt
  • pinch cayenne pepper
Preparation:
  • Chop the mango (see instructions below).
  • Seed and roughly chop the poblano pepper.
  • Place in a bowl with all remaining ingredients, stir, and let sit for 10 minutes.
  • Place all ingredients in a food processor and pulse until finely chopped but not pureed. Remove half of the mixture from the food processor and return to the bowl. Run the processor for about 30 seconds until the contents are fully pureed.
  • Mix the pureed and the chopped ingredients together and let sit for another 10 minutes before serving. Refrigerate for extra coolness.
1. Hold mango upright on a cutting board. When you look down on it the mango should be symmetrical. This means that you are looking down on the slim part of the mango pit and won't accidentally cut into it. Slice carefully about 1/3 in from the side. Repeat on the other side.
2. Once you have sliced the two "cheeks" from the mango and have discarded the pits (you can also chew the leftover mango flesh from the pit for a yummy and messy snack), make gridmarks in them with a knife.
3. Pop the mango cheeks inside out, exposing the ripe flesh.
4. Cut the flesh from the skin and into a bowl. Discard the skins.
5. Seed and roughly chop the poblano pepper.
6. Add to the bowl, toss in spices and liquids, and toss together. Let sit.
7. Pulse the mixture in a food processor until finely chopped but not pureed. Remove half of it.
8. Puree the remaining mixture and add to the chopped mixture. Let sit a bit before serving.

Saturday, May 4, 2013

Black Bean Burgers & Eggstremely Cool Science

Check out this recipe on my new and improved website: thewalkingcookbook.com

I have the ridiculously fun task of leading a cooking club at the school where I teach. We learn cooking skills, practice healthy eating habits, and get the students' hands on knives, fire, raw egg... all the things that teachers love to see their adolescents responsible for. A couple weeks ago we learned about vegetarianism and its advantages and disadvantages, especially in teens. Since most of my students are Dominican, they love their meat. However, they were really happy with the Black Bean Burgers that we made together-- a totally meatless way to get protein. Since they were such a success, I decided to make them for my apartment family this week. Along the way, I learned some really interesting facts about eggs and the role they play in Black Bean Burgers and beyond.

About Black Bean Burgers and the Power of Eggs
Black Bean Burgers are an excellent way to get protein, and there is tons of information available to show how rich in protein a vegetarian diet can be. One of my favorite infographics shows that 1/4 cup of black beans has the same amount of protein as an ounce of meat. However, this is not the point of my research this week. I'm not here to push vegetarianism, though I do feel like cutting back on animal products has a positive effect on personal and environmental health (try Meatless Mondays).

I am here to give the spotlight to a ridiculously versatile ingredient that I am guilty of having overlooked in the past: the egg. This understated ingredient was essential to this week's Black Bean Burgers, and the more I cook the more I realize how prevalent it is. I did a bit of reading about the effects of eggs in cooking (and some oohing and aahing over yet another infographic), and I learned quite a bit about their culinary superpowers and the science behind them:
  • Leavening Powers: Since eggs consist of so much liquid (88% water in egg whites and 50% in yolks), they steam when heated and promote the rising of flour. Also, beating egg whites (without the yolk, since the fat in the yolk deactivates the albumin in the whites) causes tiny air bubbles to get wrapped in the egg whites' proteins, thus keeping them fluffy and able to give simultaneous stability and lightness. Ex: popovers, cake, merengue, souffle
  • Thickening Powers: The coagulating properties of eggs (aka: their ability to become semi-solid or solid when heated) help thicken sauces, mousse, and other creamy foods by trapping the cream in a little coat of egg before the egg coagulates. This is done at a low temperature to prevent the egg from becoming solid before it has mixed with the creamy component of the recipe. Ex: custard, chocolate mousse
  • Emulsifying Powers: We all know that oil and water don't like each other. However, when you add a nice, fatty, lecithin-rich egg yolk into the mix it all changes. The fat and lecithin in the egg makes the opposing ingredients (let's say oil and vinegar) slow down as they run away from one another, essentially getting suspended in the egg and becoming more stable. Ex: Mayonnaise, hollandaise sauce, Caesar dressing
  • Binding Powers: As you will see in the Black Bean Burger recipe, eggs are used as a binding agent. They begin as a liquid, but as they are heated they coagulate and cling on to whatever is near them. This pulls ingredients together in patties, casseroles, and countless more otherwise-crumbly foods. Ex: burgers, crab cakes, baked macaroni and cheese
The humble egg is clearly a very fascinating ingredient in the world of cooking. To learn more, check out this Huffington Post article, the Exploratorium Science of Cooking site, or this outrageously technical and comprehensive reference chart from the American Egg Board.


Choosing the Recipe
Black Bean Burgers are not a fancy food, nor do they need to be. They are simple and healthy, and when I think of those two terms I always think about Whole Foods. When we are able to break down what we eat and consider each ingredient to be a food (not chemical, not imitation, not preservative), that is a whole food. I naturally turned to Whole Foods for the recipe for this dish, and I was very happy. I also knew exactly where I could go to buy them!


Memorizing the Recipe
Since it was my second time making the recipe, I was already at an advantage in memorizing. I switched a few things from the original recipe to increase the yield, but aside from that I didn't change much. The key players were 3 cans of black beans, 1/2 large chopped onion, 2.5 cups bread crumbs, and 2 eggs. I probably could have added an extra egg for a little more stability, but I didn't have any crumbling issues.

The Verdict
What can be better than a burger night with friends? There is a simple joy in placing a dozen condiments and toppings on a table, passing around patties and buns, and having at it. We used hot sauce, ketchup, mustard, dijon mustard, creamy horseradish, cheese, lettuce, tomato, sliced onion, and there were even more options still in the fridge (BBQ, ranch, caesar, blue cheese etc. etc. etc.). The burgers were a hit-- I love how they get so crispy on the outside when they are fried up in the pan. I also was pleasantly surprised that the onions did not taste raw. They weren't cooked for too long, but it was just enough for the flavor to mellow.

I wish I could say that my Sweet Potato Fries (the non-memorized side dish) fared as well, but sadly they were not even remotely crunchy. They looked so good on Cookie and Kate, where I got the recipe, so I know it was user error and not recipe error. If you have thoughts on crisping up oven-baked fries, chime in!

The Recipe
Black Bean Burgers
Adapted from Whole Foods Market
Yield: 10 burgers

Ingredients:
  • 3 cans no-salt-added black beans, drained
  • 2 1/2 cup bread crumbs
  • 1/2 large onion, finely chopped
  • 2 large eggs
  • 1/2 tsp garlic powder
  • 1 tsp dried oregano
  • 1 tsp dried basil
  • 1 sprinkle cayenne pepper
  • salt and pepper to taste
  • 3 tbsp olive or canola oil
  • 10 whole-wheat hamburger buns
  • toppings as desired (I used roma tomatoes, iceberg lettuce, cheddar cheese, sliced onions, and many, many condiments)
Preparation:
  • Toss all ingredients and crack the eggs into a large bowl. Mix together, first with a spoon then with your hands, until all of the breadcrumbs have been soaked up and the egg has been distributed evenly. Mash with a potato masher, avocado masher, or pastry blender until slightly chunky but easy to stick together.
  • Form the mixture into ten equal-sized balls, then press them into patties about 1/2 inch thick.
  • Place the oil over medium heat in a nonstick skillet. Once the oil is hot, place the patties in and cook without moving for about 6 minutes. Flip once and cook for 4 more minutes, then remove to a paper towel-lined plate.
  • Serve on the buns with your choice of toppings and condiments.
1. Combine ingredients. I love having a trash bowl (right) to toss everything in. 
2. Mash
3. Form balls then patties
4. Pan fry for about 10 minutes