Monday, June 24, 2013

Salad & Sandwich Summer: BBQ Tempeh Sandwiches and Elote & Sweet Potato Salad

Check out this recipe on my new and improved website: thewalkingcookbook.com

When people find out I don't eat meat (even after I tell them that I do, because fish is a meat), they always ask if I like tofu. My answer is always shockingly specific. I like the ultra-firm kind that does not have any juiciness to it, and I like the ultra-soft, almost custard-like, melt-in-your-mouth fresh tofu that is served warm. I had this recently on a food tour of Chinatown in Flushing, Queens. The woman selling the homemade tofu had a shop set up within a flower store, and her product was phenomenal. Anything that is not completely solid or sold at a florist's, however, I'm not a huge fan of.

Tempeh, tofu's overlooked fermented soy bean brother, is a completely different story. It is firm, crumbly, and nutty. It sometimes has a slightly tangy flavor, which is an acquired taste, but its texture makes it a great ingredient to use in dishes that can contain meat. Don't get me wrong--it's not a substitute-- but it does bear some resemblance to meat. A nice chart on the differences between tofu and tempeh can be found at FitSugar.


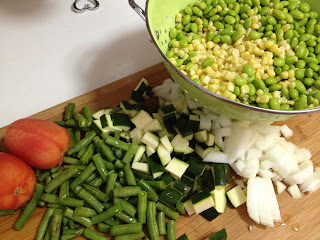
This week I made BBQ Tempeh Sandwiches topped with sprouts, avocado, tomato, and a cumin honey-mustard spread. To accompany it, I made an Elote & Sweet Potato Salad. Elote is the name for corn on the cob served in Mexico with mayo, chile powder, lime, and crumbly fresh cheese. I adapted this delicious and indulgent dish into a healthier but still hearty salad with a lime-yogurt dressing and sauteed sweet potatoes. It's perfect served room temperature or slightly cooler.


BBQ Tempeh Sandwiches with Cumin Honey Mustard Spread
From The Walking Cookbook
Yield: 4 sandwiches
Ingredients:
  • 1 pack tempeh
  • 1 tbsp vegetable oil
  • 1/3 cup BBQ sauce
  • 2 avocados
  • 1 cup alfalfa sprouts
  • 2 tbsp dijon mustard
  • 1 tbsp honey
  • 1 tbsp mayonnaise
  • juice from 2 limes
  • 1/2 tsp cumin
  • salt to taste
  • 4 hamburger buns, toasted
Preparation:
  • Cut each rectangle of tempeh in half. Then slice down the middle of each piece to make four thin rectangular slices.
  • Steam the pieces of tempeh for 3-4 minutes each, then place in a preheated pan with 1 tbsp oil.
  • Cook on each side until browned, about 1 minute per side. Remove and place on a plate.
  • Brush the tempeh on both sides with BBQ sauce and return to the pan. Cook for 2 minutes on each side. Remove and brush again with BBQ sauce.

Cut and steam

Cook, then add more sauce
  • Slice the avocados and tomatoes and place on a serving platter. Place the sprouts in a bowl (or if you are like me, keep them in a container to save a dish!)
  • In a bowl, combine the spread ingredients (dijon mustard through salt) and mix well.
  • Assemble the sandwich: Spread the toasted bun with cumin honey mustard. Place a slice of tempeh, avocado, tomato, and sprouts on top. Add more BBQ sauce if desired. Enjoy!

Elote & Sweet Potato Salad
From The Walking Cookbook
Yield: 6 large servings

Ingredients:

  • 2 large sweet potatoes
  • 3 tbsp vegetable oil
  • 5 large ears of corn
  • 1/2 cup greek yogurt
  • zest and juice from 1 lime
  • 1 tbsp fresh cilantro leaves, chopped
  • 1/2 tsp salt
  • 1/2 tsp smoked paprika
  • 1/4 tsp cayenne pepper
  • 1/2 cup queso fresco, crumbled (another crumbly, fresh, salty cheese like feta will work too)
Preparation:
  • Peel the sweet potato and cut into small cubes (just smaller than a board game die). Place in a bowl and toss with oil.
  • Heat a non-stick pan over a medium-high flame and put one layer of sweet potato cubes in the pan (I did this in three batches). Cook for 4 minutes, flip, cook for another 4 minutes, pour in 1/4 cup of water, cover, and cook for 4 minutes. Remove the lid and test the largest cube to make sure the sweet potato is cooked through. Once cooked, place on a plate to cool off a bit.
  • Repeat with the remaining sweet potatoes.

Slice and organize by size

Cut each stack into strips then into cubes
They will probably fall. That's ok. Just coat them in some oil and cook.
  • Simultaneously heat a separate pan over a medium-high flame and place the husked ears of corn inside. Cook for 2-3 minutes, and rotate once the corn kernels begin to char a bit. Continue until all sides of the corn have a browned exterior.
  • Once the corn has cooled a bit, cut the kernels off the cob and place in a bowl.
A grill pan would work beautifully for this corn.
  • Add the cooled sweet potatoes to the bowl of corn.
  • In a separate bowl, combine the dressing ingredients (greek yogurt through cayenne pepper) and mix well. Taste, and add more yogurt and/or lime juice if the dressing is too spicy.
  • Dress the salad and mix well.
  • Crumble in the cheese and mix well. Serve room temperature or slightly chilled.

Friday, June 14, 2013

Salad & Sandwich Summer: Coconut Shrimp & Curried Cauliflower Báhn Mì with Cucumber Lemongrass Salad

Check out this recipe on my new and improved website: thewalkingcookbook.com

Báhn mì have been trendy in New York City since 2009. Although bao, arepas, and other street food, filling-smooshed-between-starch delicacies have had their moments since then, but the lovely Vietnamese sandwich has not yet been overshadowed. I've never cared much for trends... by the time I catch on they are usually on their way out (like the prairie skirt of 2005). Fortunately, even when food trends go out of style, they are still delicious and nobody will criticize you for enjoying them. In case you're curious, Bon Appetit published this list of food trends for 2013. Keep your eyes open!

This week for Salad & Sandwich Summer I made two types of báhn mì: coconut shrimp and curried cauliflower. I was inspired by Num Pang, a New York restaurant that serves Cambodian sandwiches (which are, naturally, very similar to báhn mì due to geographical proximity). In addition, I put together a Cucumber Lemongrass Salad, a cool, refreshing side dish with homemade dressing.

These sandwiches have a lot of components and may seem overly arduous, but fear not: Each component can be done quickly and in advance. Then they just hang out until you are ready to use them. I'll break the whole meal down in the order that I did everything, from pickled veggies to salad dressing to sandwich assembly. All of these can be made in large quantities and made into a make-your-own-báhn mì buffet. Yummm...


Coconut Shrimp Báhn Mì
Curried Coconut Cauliflower Báhn Mì
Step 1: Pickle the vegetables

Ingredients (yield: 3 cups pickled veggies):
  • 1 daikon radish
  • 2 carrots
  • 1 cucumber (Optional: Use if you are not also making the salad. Otherwise it's cucumber overkill!)
  • 1/2 cup rice vinegar
  • 1/4 cup sugar
  • pinch of salt
Preparation:
  • Peel the veggies and cut off the stem.
  • Using a food processor slicing blade, a mandoline, or your awesome knife skills, slice the vegetables very thin.
  • In a wide bottom dish, whisk together the vinegar, sugar, and salt until dissolved.
  • Add the veggies, toss in the vinegar, and let sit. Stir and flip the veggies every 15 minutes or so. Can be made up to 1 day in advance if covered and refrigerated. The longer they sit, the more pickley they are.


Step 2: Prepare the shrimp


Ingredients (yield: 4 sandwiches' worth):
  • 1/2 jalapeño, seeded and julienned
  • 1/2 can coconut milk
  • zest and juice of 1/2 lime
  • 1 lb shrimp, peeled, deveined, and tails removed
  • 2 tbsp vegetable or coconut oil
Preparation:
  • Mix all ingredients together.
  • Add the shrimp, toss in the marinade, cover, and refrigerate for at least 30 minutes. Can be made up to 1 day in advance.
  • When it is time to cook (step 6), heat the oil over a medium flame.
  • Discard the jalapeño from the marinade and add the shrimp and marinade to the pan.
  • Cook for about 4 minutes, or until shrimp turn pink. Pour into a bowl and serve with a slotted spoon.

Step 3: Prep the salad and dressing


Salad Ingredients (yield: 3 cups):
  • 2 cucumbers
  • 1 avocado
  • 1 green onion (green and white part)
  • 1 tbsp fresh mint
Dressing Ingredients:
  • 1 inch piece of ginger, peeled
  • 1 small stalk lemongrass, cut into inch-long pieces
  • 1/2 lime, peeled
  • 2 tbsp vegetable oil
  • 2 tsp soy sauce
Preparation:
  • Slice the cucumbers thin (I used a food processor) and place in a bowl.
  • Chop the green onion and mint and add to the cucumber.
  • Place all dressing ingredients in a food processor with the normal chopping blade. Pulse until a dressing is formed. With a spatula, push down any dressing that stuck to the sides.
  • Dress the salad, toss, and refrigerate for up to an hour.
  • When you are ready to serve, cut the avocado into small cubes. Toss with the salad and serve.

Step 4: Make the Ginger Sriracha Sauce


Ingredients (yield: 1/2 cup):
  • 1/4 cup olive oil
  • 1/4 cup vegetable oil
  • 1 medium egg (large works too-- just up the oil a little)
  • 1 clove garlic
  • zest and juice from 1/2 lime
  • 2 tsp sriracha sauce
Preparation:
  • Rinse out the food processor and insert the chopping blade.
  • Place the egg, ginger, lime zest, and garlic (missing from my picture-- last minute add-in) into the processor.
  • Pulse until solids are chopped and incorporated into the egg.
  • Turn on the processor and slowly pour in the oil.
  • Once the egg has mostly emulsified, with the machine still on, squeeze in the lime juice and add the sriracha. Mix for another 5 seconds, pour into a container, and refrigerate. The sauce will keep for 5 days in the refrigerator.

Step 5: Cook the Curry Coconut Cauliflower


Ingredients (yield: 6 sandwiches' worth):
  • 1/4 cup unsweetened coconut flakes
  • 4 tbsp coconut oil
  • 1 head cauliflower
  • salt, pepper, and curry powder
Preparation:
  • Heat a non-stick pan over a medium flame.
  • Add coconut flakes and toast, stirring frequently, until golden brown. Remove from the pan and let cool on a separate plate.
  • Slice head of cauliflower into 1/2 inch steaks. Some will crumble, but you should be able to get a few good disks.
  • Rub each slice with coconut oil and season with salt, pepper, and curry powder (a few shakes of each) on one side.
  • Heat 2 tbsp coconut oil in the same non-stick pan. Place the cauliflower steaks in the pan curry side down. Sprinkle salt, pepper, and curry on the top side and cover.
  • Cook over medium heat for 4 minutes, then flip, cover again, and cook for 2 more minutes. The cauliflower should be browned and just soft enough for a fork to go all the way through with a tiny bit of resistance). Remove from the heat, place on a plate, and sprinkle both sides with toasted coconut flakes.

Step 6: Cook the shrimp
See step 2.

Step 7: Finish the salad
See step 3.

Step 8: Assemble the sandwich

Ingredients (yield: 4 sandwiches):
  • 1 Vietnamese baguette (buy or bake your own), divided into 4 pieces and sliced sandwich style
Preparation:
  • Toast the baguette pieces.
  • Laying the bread on the plate in front of you, slather a bunch of Ginger Sriracha Sauce on the inside of each piece.
  • Top with pickled vegetables and some sprigs of cilantro.
  • Add the cauliflower or a few coconut shrimps.
  • Top with toasted coconut, if desired.
  • Gobble down the sandwich and say Cám ơn (thank you) to Southeast Asia.

Tuesday, June 11, 2013

Salad & Sandwich Summer: Caprese Sandwich with Pine Nut Aioli and Shaved Brussels Sprout Salad

June is here, and although the solstice is not yet upon us, summer is here in my mind. To celebrate the breezy, fun, and warm joys of summer, The Walking Cookbook will feature simple salads and sandwiches all summer long. Why salads and sandwiches?
  • First of all, it's awesome alliteration (Salad & Sandwich Summer)
  • Less cooking means less heat! There will be some stovetop and toaster oven action, but the goal is to reduce the use of our big, hot, poorly insulated oven in our non-airconditioned apartment.
  • Sandwiches and salads are just so easy to make. The ingredients can be prepped ahead of time and layered or tossed together just before serving.
The layout of Salad & Sandwich Summer will be a little simpler than normal, since I'll be focusing less on memorizing master recipes and a little more on playing with culinary ideas. So let's get the ball rolling with a recap of my Caprese Sandwiches with Shaved Brussels Sprout Salad.

Caprese Sandwich with Pine Nut Aioli
One of my favorite appetizers growing up was Insalata Caprese, the delicious layered "salad" with slices of fresh mozzarella, tomato, and basil. It originated in Capri, Italy, and is best known in the US as having olive oil, salt, pepper, and balsamic vinegar as a dressing (though the balsamic was added by Americans).

I decided to use the freshness of Caprese in a main course by turning it into a sandwich. The basic assembly came from the various ingredients. My own special touch was to add a pine nut aioli, which is basically a fresh, garlicky mayo with pine nuts added in. I was scared at first, but now I want to make everything into aioli! It is definitely better than just adding flavors to pre-made mayo.


The Recipe: Caprese Sandwich with Pine Nut Aioli
From The Walking Cookbook
Yield: 4 sandwiches
Sandwich Ingredients:
  • 1 long baguette, cut into fourths and each section split down the middle
  • 1/4 cup extra virgin olive oil
  • 1/4 cup balsamic vinegar
  • 1/4 cup pine nut aioli (see recipe below)
  • 1 log fresh mozzarella cheese, sliced
  • 3 tomatoes, sliced
  • 1 cucumber, sliced thinly at an angle
  • 2 handfuls fresh basil leaves, torn into medium pieces
  • salt and pepper
Sandwich Preparation:
  • Lay the bread open and brush the inside of each piece with olive oil.
  • Heat a non-stick pan or griddle to medium heat.
  • Place each piece of bread oiled-side down onto the heat until just toasted around the edges. Remove and repeat until all bread is lightly toasted.
  • Brush the inside of each bottom piece of bread with balsamic vinegar. Don't skimp!
  • Spread 1 tbsp aioli on the inside of each top piece of bread.
  • Assemble each sandwich: Layer tomato slices and cucumber slices on the bottom piece of bread. Layer basil pieces and mozzarella slices on the top piece.
  • Grind some black pepper and sprinkle some salt over the toppings.
  • Fold the sandwich together and enjoy!
My first gif! Awesome!!
Pine Nut Aioli Ingredients:
  • 1 large egg
  • 2 cloves garlic
  • 1/2 cup canola oil
  • 1/2 cup olive oil
  • juice of 1 small lemon
  • 1/4 cup pine nuts, toasted
  • salt to taste
Pine Nut Aioli Preparation:
  • In a food processor, blend the garlic and egg until the garlic is chopped and well mixed in.
  • Remove the food pusher from the food processor and turn the machine on. Very slowly pour in the oils until the the mixture is smooth, cream colored, and looks like mayo (that's what you just created!!)
  • Squeeze in the lemon juice, sprinkle in some salt, and toss in the pine nuts. Pulse until the pine nuts are chopped but not pureed.
Shaved Brussels Sprout Salad
I had dinner a few months ago at Left Bank in the West Village, and although I was impressed with everything there, the real winner was the Brussels Sprouts Salad. The sprouts were raw and thinly shaved, tossed with a light dressing of lemon juice, olive oil, salt, and pepper. Finally, they topped the salad with shredded aged cheese and toasted hazelnuts.

I have recreated this recipe many times since, and I am always happy with it. Since I am not a huge hazelnut fan, I have used walnuts and pine nuts as substitutes. I tend to add in some lemon zest and a healthy dose of parmesan cheese as well (always cutting a hunk off to nibble on while I cook).

The Recipe: Shaved Brussels Sprout Salad
From The Walking Cookbook, inspired by Left Bank
Yield: 4 servings
Ingredients: 
  • 1 lb fresh brussels sprouts
  • 2 tbsp extra virgin olive oil
  • 1 lemon, zested and juiced
  • 1/2 cup toasted pine nuts (or nuts of your choice)
  • 1/4 cup freshly grated parmesan cheese
  • salt and pepper
Preparation:
  • Cut the stem off of the Brussels sprouts and shave or chop them into fine shreds. Toss into a bowl.
  • Dress with olive oil, lemon juice, lemon zest, salt, pepper, and parmesan cheese. Hand toss and serve cold.

Sunday, June 9, 2013

3 Sisters Edamame Succotash and Jerk Tilapia

Check out this recipe on my new and improved website: thewalkingcookbook.com

If you are like me, the first thing you think of when you hear the word succotash is not food at all... it's Looney Tunes. Sylvester the Cat is known for his exclamation, "Sufferin' succotash!" whenever he is exasperated, like this:
If you are more like me, you have taken this word for granted and finally decided that you should figure out what it means. This week I cooked Edamame Succotash and Jerk Tilapia to accompany it. That's right-- I made the Succotash the star of the show.

About Succotash
The phrase we know and love(?), "Sufferin' succotash," itself is a minced oath, which is basically a replacement word or phrase for a curse word. There are plenty: Oh my gosh! Darn it! Oh fudge! What the heck!? The list goes on. "Sufferin' succotash" is said to be a depression-era phrase replacing "Suffering Savior," the latter of which clearly violates certain Christian standards of making reference to Jesus. It is obviously outdated, and a similar outburst of exasperation can be delivered through more modern sayings. Succotash was not an invented word to replace savior, however; it was a real food with a real place in society at the time (and way before).

In its most basic form, succotash is a dish consisting of cooked beans and corn. Modern nutritionists have all sorts of scientific grounds for corn and beans to be eaten together (they form a complete protein, meaning that all the essential amino acids are accounted for between the two foods). However, the real geniuses behind this dish were probably not discussing amino acids. In fact, they were not speaking English at all. Succotash comes from the Narragansett word msickquatash, and it was in fact Native Americans who are credited with the development of this dish. The Native American "three sisters" (corn, beans, and squash) are famous crops because of their miraculous way of working together, both in soil and in the human body. To this day, some regional varieties of succotash include squash as well as corn and beans.

While the ingredients can be tweaked a little to fit personal preference, the majority of succotash recipes call for lima beans, corn, and a cream or butter sauce.

Choosing the Recipe
I intended to make a succotash involving all three sisters: corn, squash, and beans. I found the recipe from Food Wishes, a video blog, and let that be my guide. Unfortunately (for some-- fortunately for others) I was unable to find either fresh or frozen lima beans. Having no interest in canned limas, I opted for frozen edamame, or soy beans, instead. It was delicious and packed a nice protein punch (1 cup of limas provides 29.3% of your daily recommended protein, while edamame gives 57.2%).

I did a bit of research into jerk spice blends, and I ended up choosing my favorite one based on the funny nature of the blog it came from. Cooking for A**holes (reader discretion advised) made me laugh out loud, so I had to go with that recipe. It's a quick meal with a ton of flavor.

Memorizing the Recipe
The succotash recipe required little to no technique. Butter and oil go together in a pan. Start the onions, then add the more firm, raw ingredients (green beans and zucchini). Toss in the edamame and corn once the other veggies have started to brown a little. Keep cooking, then top with tomatoes for color. Salt and pepper and taste along the way. Bam. Done.

The jerk spice blend was a little tricky to master, although knowing which spices had more dominance and which had less was helpful. Allspice got the most; followed by thyme, garlic powder, and nutmeg; then salt, pepper, cayenne, and cinnamon took a back seat since they are inherently spicier or more bold than the others.

The Verdict
I had a heaping pile of succotash at dinner and another heaping pile at lunch the next day. I would eat this hot, cold, room temp, alone, as a side, on rice, on pasta, slightly pureed into a spread, in a box, with a fox, here and there, anywhere! I really love vegetables, and this was a simple and delicious way to get a lot of them at once.

For those of you who have not cooked (or eaten) a lot of fish, tilapia is a nice, easy go-to fish. It's not too fishy, it cooks quickly because it's thin and light, and it's really inexpensive. It takes on the flavor of whatever it is cooked with, so the jerk spice blend was an excellent way to make a boring fish more exciting. This whole meal takes about an hour (probably less if you aren't stopping to photograph all the time).

The Recipes
3 Sisters Edamame Succotash
Inspired by Food Wishes
Yield: 8-10 servings, depending on how hungry you are

Ingredients:
  • 3 tbsp butter
  • 2 tbsp olive oil
  • 1 yellow onion, roughly chopped
  • 2 zucchini, cut into 1/2 inch cubes
  • 2 cups fresh green beans, cut into inch-long pieces
  • 1/2 bag frozen edamame (shelled), thawed
  • 1 bag frozen corn kernels, thawed
  • 2 roma/plum tomatoes, peeled and roughly chopped
  • salt and pepper
Preparation:
  • Heat the butter and oil over medium heat in a large skillet.
  • Once melted, add the onion and cook until softened, about 4 minutes.
  • Add the zucchini and green beans, coat with the butter/oil, and cook, stirring occasionally, for 5 minutes.
  • Season the vegetables with salt and pepper.
  • Add the edamame and corn to the skillet. Mix and cook for another 5 minutes until all vegetables are warm but still firm.

Jerk Tilapia
Adapted (and censored) from Cooking for A**holes
Yield: 10 tilapia filets (spice blend can be kept for later when making smaller portions)

Ingredients:
  • 10 tilapia filets
  • 3 tbsp olive oil
  • 2 tbsp allspice
  • 1 tbsp garlic powder
  • 1 tbsp thyme
  • 1 tbsp nutmeg
  • 1 tsp salt
  • 1 tsp black pepper
  • 1 tsp cayenne pepper
  • 1 tsp cinnamon
Preparation:
  • Combine allspice, garlic powder, thyme, nutmeg, salt, pepper, cayenne, and cinnamon in a bowl. Mix well.
  • Lay the tilapia on a flat surface. Spoon a generous amount of jerk blend on top of each piece (1 heaping spoonful). 
  • Pat/rub the blend on the entire top surface of the tilapia.
  • Heat the oil in a nonstick pan. Place the tilapia, seasoned-side down, in the pan (as many as will fit-- I did three filets at a time). While the fish is cooking (about 2 minutes over high heat), sprinkle the other side with a little more jerk blend. 
  • Flip and cook for another 2 minutes (3 for the thicker pieces).
1. Blend

2. Season
3. Cook
4. Flip